Before sinking in a work of our LAN server, let’s consider the way people recorded demos a long time ago.
How it used to be earlier
Even if you've just installed the game, you can start recording: create a New Game with any kz map you want and write
record mydem.dem in console, from this moment recording starts. Then press start button, finish the map. Built-in map timer will show your time with second accuracy. Write
kill command in console (it was needed to show your nick, now it’s more like an etiquette rule), then write
stop. Open cstrike folder, find
mydem.dem and name it according to this template:
mapname_yournick_time.dem. If you want to start recording anew, write
sv_restart 1 in console, so round restart will happen in one second. It’s necessary not just for teleporting to map respawn, but for breakable objects of the map to be restored.
Even then people were tend to automation. For instance, they used this kind of
bind (“F4” button is for example):
bind “F4” “stop;sv_restart 1;record mydem.dem”
Thus, in case of fail player just presses
F4 and starts a new run in a second.
At the same time players faced with a problem of time accuracy. The longer they stayed on a map, the more inaccurate map timer was (so called Timer Bug). Programs appeared later could determine exact run time (accurate within milliseconds). Then special KZ plugins were created, which were able to calculate the time. And much, much more handy things. And here we meet the main part of the article.
Recording a run with help of KZ-Rush LAN server
First of all you will need a
Steam CS 1.6. Create a
New Game, then close CS (you need to do it at least once after game installation).
Install KZ-Rush LAN server. LAN server will introduce automation into process of demo recording, not mention to a bunch of useful functions for trainings.
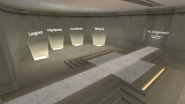
After installing create a New Game with a map that you want to play. You will see main menu (it can be opened by pressing
M button as well). It changes its appearance depending on the recording mode:
1. Checkpoint - Save position (command
/cp)
2. GoCheck - Load position (command
/gc)
4. Start / New Demo - Depends on the recording mode (command
/start)
5. Save start position - Save position as default start (command
/savestart)
6. Settings - Open Settings menu (command
/settings)
7. Mode: No Demo / KZ Mode / LJ Mode - Change recording mode (cvar
kz_mode)
8. Servers / Stop Demo / Save Demo - Depends on the recording mode (command
/stop)
9. VIP - Special menu for server host (command
/vip)
0. Exit - Close menu
Item
7. Mode allows you to choose from the following recording modes:
No Demo (
cvar kz_mode 0) - use it when you want just to play on LAN with friends and don't want to record a demo. Item
4. Start will just teleport you to the start and
8. Servers will show the list of our servers, so you can connect to them.
KZ Demo (cvar
kz_mode 1) - the mode for recording KZ demo, here
4. New Demo will teleport you to the start, perform instant restart and start new demo, while
8. Stop Demo will stop recording
beforehand with name
!LAST_KZ_DEMO.dem. Early save comes handy when you don't want to finish the map, but still want to save current demo (for example you did plaguy mistake and want to share it). To finalize successful demo use finish menu (we will consider it below).
LJ Demo (cvar
kz_mode 2) - the mode for recording LJ demo, here
4. New Demo will teleport you to the last saved position and start new demo, while
8. Save Demo will save demo with name
!LAST_LJ_DEMO.dem. Note that by default item
2. GoCheck in this mode works the same way as
4. New Demo. It's made for your convenience, but if you want to use
2. GoCheck only for teleport, change corresponding setting in
menu.
Note that when you record demo, line
KZ Demo / LJ Demo in menu changes its color to red. Besides, if you want to switch to another recording mode, you will have to stop the recording first with help of item
8 or by typing
/stop command in chat.
If you record demo in KZ mode, then after pressing the finish button you will see the Finish Menu:
Notice that when using items
1 and
2 of the Finish Menu your demo will automatically be renamed according to the template
mapname_nick_time.dem (for example
fmc_torres_sunman_0309.09.dem) with the nick used at the moment of choosing menu item. Since a lot of players tend to jump with other nicks and our upload form requires the same nick as used on the site, a special cvar
kz_name was created. For instanse, you write
kz_name "sunman" in console, and all demos will be saved with this nick, no matter which name was used in demo. To reset cvar value write
kz_name "" or
kz_name 0.
How to upload demo on the site?
First of all you need to be rating participant. If you still haven't bind your Steam account to the site profile, learn how to do it in
this article.
Then you can upload your demo to the site through our upload form. You can find up in [b]Records[b] menu. There are also list of maps available for recording and recording rules. Read them carefully before using upload.
Site records will be shown in map profiles and your own site profile. You can find more info about our point system
in this article. Thus, from this moment you are participating in our rating :)


